
Regardless the size, model railroads require regular maintenance. Cleaning track, dusting scenery and structures, and maintaining equipment are just some of the things that require attention. Not keeping up on these tasks will lead to a layout that runs poorly, looks tired, and potentially cause you (and/or members of your operating crew) to lose interest. Here are 5 layout improvement tips that will keep your model railroad looking its best.
Maintaining the fleet
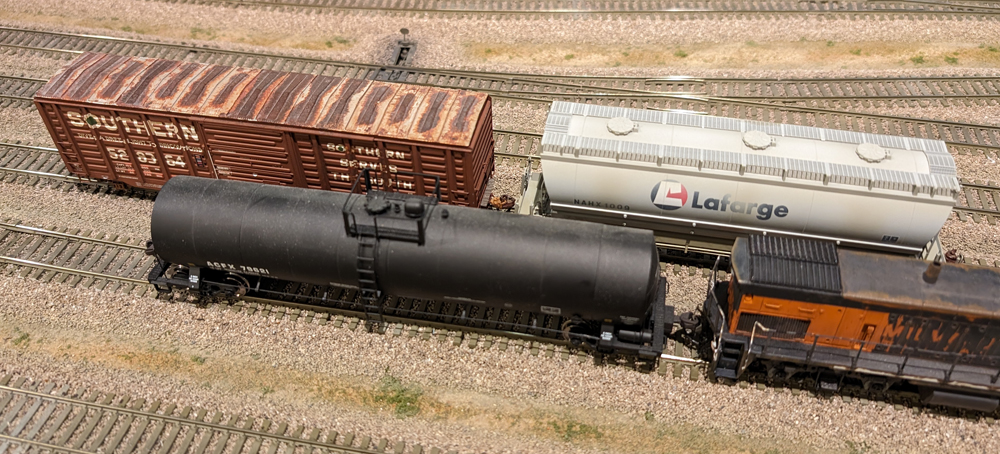
Building a locomotive and freight car fleet isn’t cheap, so you want to take care of your equipment. To keep the models looking their best, dust the easy-to-reach areas with a soft brush. Then take the models out of the layout room and use compressed air or an air hose connected to a compressor to get rid of dust and cobwebs on caboose platforms, locomotive walkways, and other hard-to-reach spots. Switch to cotton swabs for cleaning off ladder rungs and brake details inside end cages.
Also inspect locomotives and freight cars for damaged parts. Look for things like missing grab irons and window glazing, broken stirrup steps, or low-hanging couplers, among other items. Place these engines and cars on a RIP (repair-in-place) track. Do not put the equipment back into service until the repairs have been made.
Make time for touch-ups
Scenery on a working model railroad is subject to wear and tear. An operator lining a turnout may break a switch stand or ground throw, rerailing a locomotive or freight car may disturb ballast or adjacent scenery, and an errant elbow may damage trees (for a clever solution to this problem, read Model Railroader Contributing Editor Tony Koester’s article “Trees that bend without breaking” in the August 2013 issue of MR).
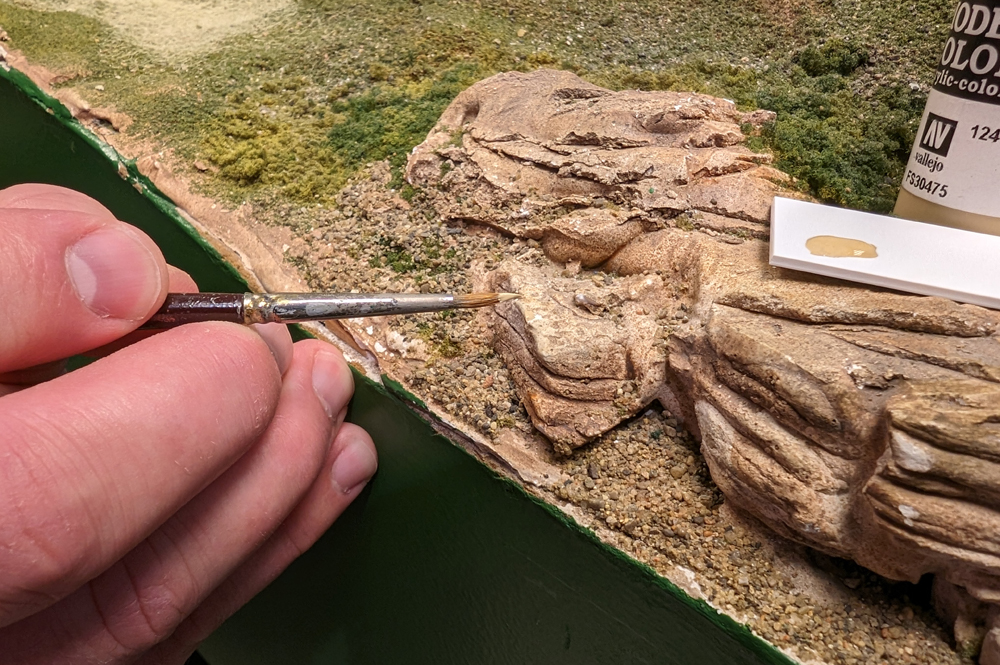
On our HO scale Milwaukee, Racine & Troy staff layout, some aisle-hugging Hydrocal rock castings between Big Bend and Mukwonago needed to be repaired after the edges were chipped. Though the chips were small, the bright white spots detracted from the neatly painted and weathered castings. To remedy this, I touched up the chips with hobby paints that reasonably matched the original colors, which had been applied decades earlier. I followed up with some light weathering to make the repairs less noticeable.
Deep clean the details
When cleaning a model railroad, it’s natural to cover the obvious locations like structure rooftops, trees, and water features. Check out Steven Otte’s article “Seven things not to miss when cleaning a model railroad” for more helpful tips. However, it’s also important to deep clean the details.
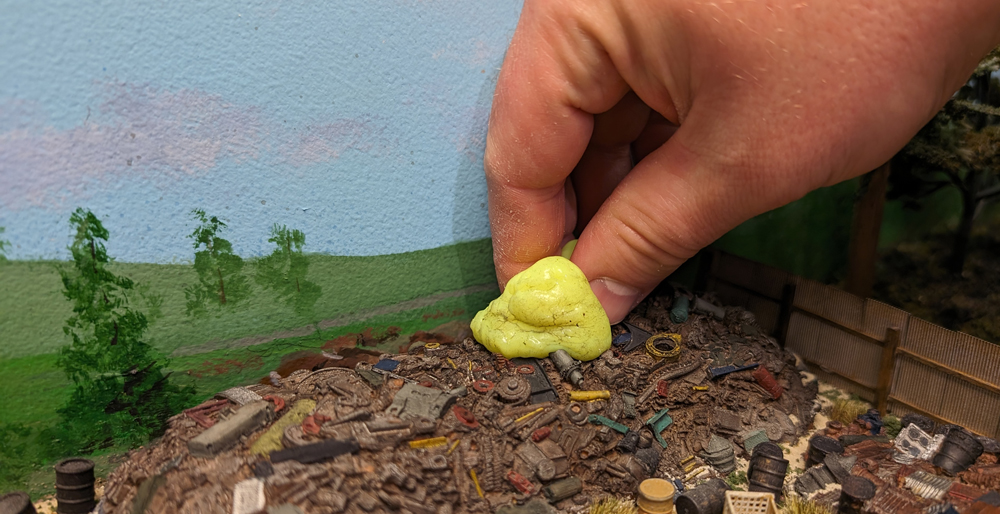
In late 2010 I added a scrapyard scene to the HO scale MR&T (Read “Model a scrapyard” in the February 2011 issue of MR.) The scene features molded scrap piles from Monroe Models and Pre-Size Model Specialties. Compressed air or a paintbrush could be used to clean the castings, but those techniques will simply redistribute the dust on the layout. A better solution is to use the Dust Dabber from Woodland.
The Dust Dabber is designed for use on non-porous surfaces, such as cast detail parts, plastic buildings, freight car loads, and water features. After grabbing a small pinch from the container, roll it into a ball between your fingers. Then dab or roll the material over the area you want to clean. Because the material conforms to what it’s cleaning, it will get dust and dirt out of hard-to-reach areas.
You can watch a video demonstration of the product in the May 2017 episode of “Cody’s Office.”
Sweat the little things
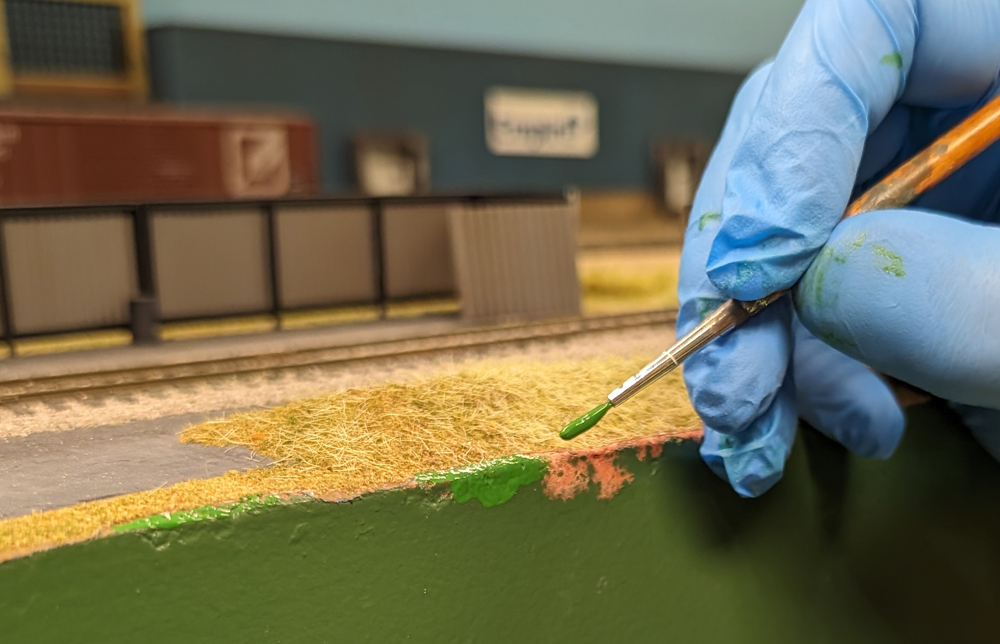
Believe it or not, our current HO scale MR&T staff layout is celebrating its 35th anniversary in 2024. During that time, several sections of the model railroad have been revamped at least once. Though we do our best to protect the tempered hardboard fascia and adjacent scenery during construction projects, sometimes touch-up work is necessary.
As part of “Rehab My Railroad: Jones Island,” David Popp and I relocated a building from Kelly’s Island to Mukwonago. Even though we masked the tempered hardboard fascia before applying tinted Sculptamold to the scene, some of the papier-mâché-like material wicked under the tape. After the Sculptamold dried, some light sanding and touch-up with green paint was all it took to make the fascia look like new again.
Weather the scenery
When you hear a discussion about model railroad weathering, locomotives and rolling stock are probably the first things that come to mind. However, in my time with the magazine, I’ve also become a fan of weathering scenery.
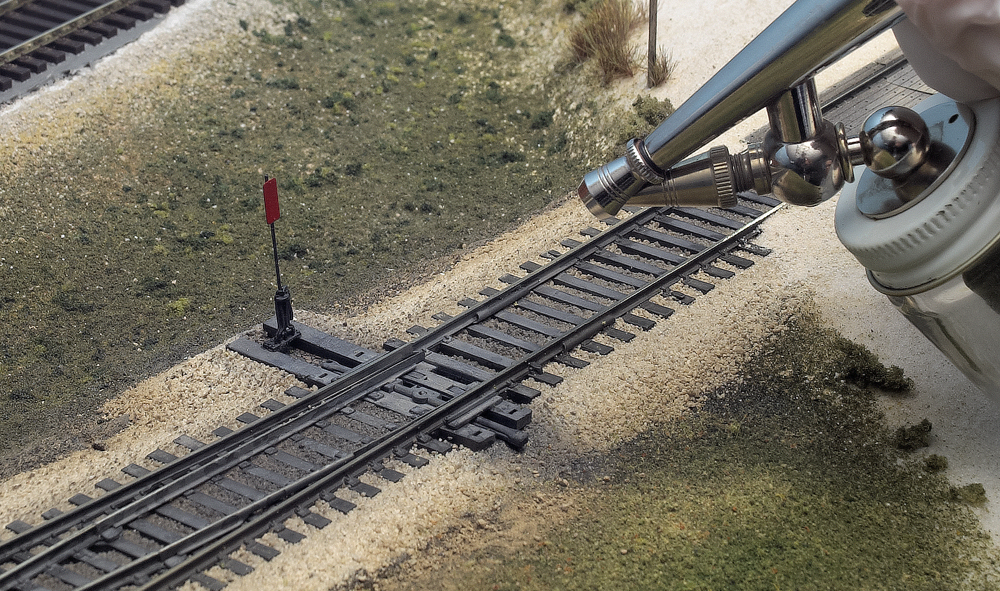
On our HO scale MR&T, we primarily use limestone ballast. Though it appears fine in person, it looks blown out in photographs. To remedy this, several years ago I began using acrylic paints (thinned to a wash) and an airbrush to tone down the bright granules.
I start by spraying Engine Black in the gauge of the rail. I also apply the color along the switch rod on each turnout to simulate oil and grease used to lubricate the working parts.
Where the ballast meets the adjacent scenery, I switch to an earth-toned paint. Subtle is the key here. My goal is to feather in the edge where the ballast granules meet the ground foam.
Scenery weathering doesn’t have to stop with ballast. Streets and roads, trees, and rock outcroppings are other items that can benefit from the simplest bit of weathering.


0 Comments